Sow what exactly is HDR? I spoke about it in the previous post, and I thought I would bring it to life, just to show you what a neat tool it can be. Now like anything, HDR, which stands for High Dynamic Range (thanks Chris!) can be too much of a good thing, but it can also be a crucial tool if one forgot their Neutral Density (ND) Filters and the exposure differences are too great to overcome. Sometimes a fine-art picture with blown out whites just won’t do. Thank goodness for software and digital cameras.
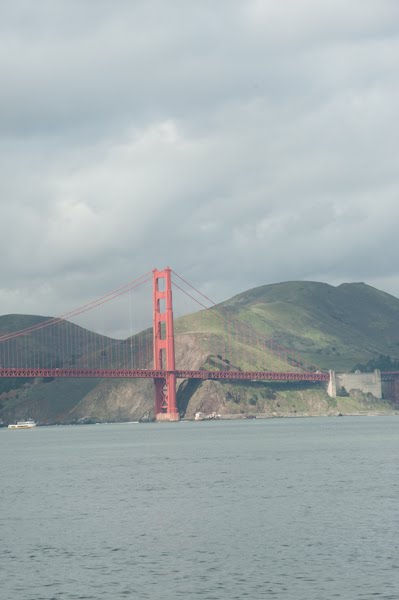
Here we can see the typical snapshot of the Golden Gate Bridge. Washed out, because the camera just can’t cover the lighting extremes. It’s not quite what our eye sees, but it’s close. Dramatic? I think not.
Now if I had my ND filters, I would put them in front of my lens to balance the sky vs foreground better. Oh, I forgot to describe what they even are. An ND filter is a rectangular shaped piece of acrylic or glass that has half the material shaded darker, and then transitions to completely clear. The transition can be hard or soft, meaning an almost solid line of gradation, or a bit more drawn out. They are color neutral, so they don’t cast a weird blue or any other color into your image.
If I were using one on this image, I would probably use a soft graduated ND and put it at a bit of an angle to match tower and the line of mountains where it intersects. But that might give you a funny shadow line, so maybe even drop it down to the water line. It’s all about experimenting and finding out what works best.
But alas, what if you didn’t have them? Well, use a tripod, a bench, a concrete piling, a car hood – whatever you can find to keep your camera absolutely still. Then you have to set the camera to bracket a series of shots. This means you’re taking the same image at different f-stops or speeds to create a different rendering of light. I bracketed five different shots to have a broad range of light, but you can easily get away with three. It sounds like a lot of work, but it’s not. Know your camera and get this done in seconds.
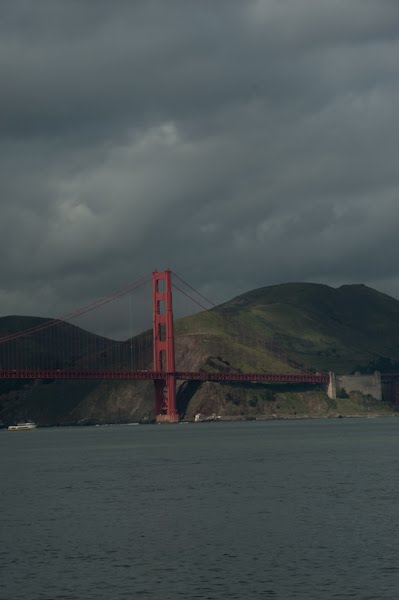
 Now what is the final result? Well, take your images home, download them to your computer, and run them through a program such as Photomatix or Photoshop. The latter does a better job and allows more control, because it’s specific to HDR merging. If you are into it, it’s worth purchasing due to the ease of use and results. As you can see, they’re pretty dramatic.
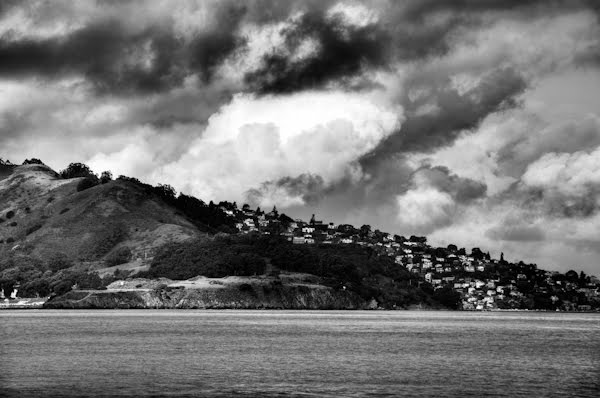
But remember when I said too much of a good thing can be, well, too much? This is probably it. I over-pumped the image to give you a dramatic intro into what HDR can do. But here is a more subtle version of the same images rendered a bit more cautiously. Now go up to the top of the post and compare this image to what the camera would have captured by itself. You can see the differences are subtle, but noticeable.
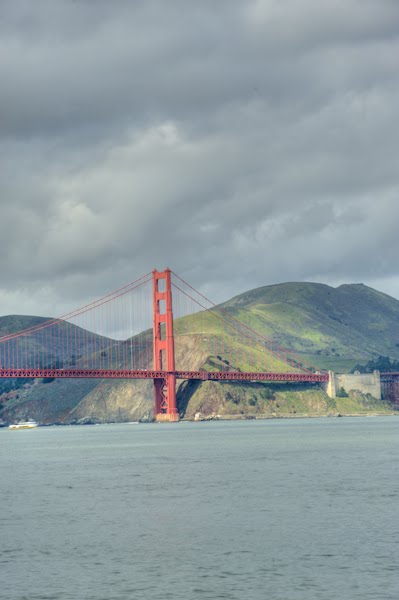
This is probably closer to what your eyes see. Which one is better? That’s the great thing about art. It’s up to you! Salt to taste.
Now these are quick and dirty, but I am having fun with these images, and I think you’ll be seeing some more of them as this year progresses. Until then…
See you down the road.
-Todd

Awesome entry toddtastic.
Dude! I haven’t stopped by in a while. Your site and blog are really looking good and of course your photos are amazing. Nice piece in Good Magazine.
Sarah
Thanks Sarah-
The chickens pics are still going strong. They were just picked up in a monster dot com side site, so hopefully I will get a little more exposure. Glad you are enjoying it, and do stop in a bit more often 🙂
At last! Someone who understadns! Thanks for posting!
Ws7NoW lpplkzuqqbwd